Shared File Transfer Integration through Mulesoft
January 20, 2022
How Many Types of Salesforce User Licenses Are There?
July 28, 2022Scenario:
We configure the Latest version of the NetSuite connector and perform some basic operations on it, Like
- Adding
- Retrieving Data.
The Latest NetSuite Connector requires a Consumer Key, Consumer Secret, Token ID, Token Secret, and Account ID

To retrieve these 4 values you must follow a few steps.
- Token Based Authentication must be enabled in NetSuite. Goto Setup > Company > Setup Tasks > Enable Features navigate to the SuiteCloud subtab. Enable the required features:
- Client SuiteScript
- Server SuiteScript

- Setup Token Based Authentication, It is a Per User Authentication and requires certain permissions in NetSuite. An existing role can be used (recommended) or a new role can be created. The relevant role permissions are under the ‘Setup’ subtab. The following token-based authentication permissions can be added to non-administrator roles as appropriate.
- Access Token Management: Users with this permission can create, assign, and manage tokens for any user in the company, and cannot use token–based authentication to log in to the NetSuite UI.
- Log in using Access Tokens: Users with this permission can manage their own tokens using the Manage Access Tokens link in the Settings portlet, and they can log in using a token.
- User Access Tokens: Users with only this permission can log in using a token, that is, they can to use tokens to call a RESTlet, And they cannot manage tokens or access pages where tokens are managed.

- Assign Users to Token Based Authentication Roles, The Token Authentication Role will need to be assigned to all employees associated with the integration under the ‘Access’ subtab on their employee record.
-
- Go to Lists > Employees > Employees.
- Click Edit next to the name of the employee you want to assign the token-based authentication role.
- Click the Access subtab
- In the Role field, select the token-based authentication role for this employee.
- Click Add and Save

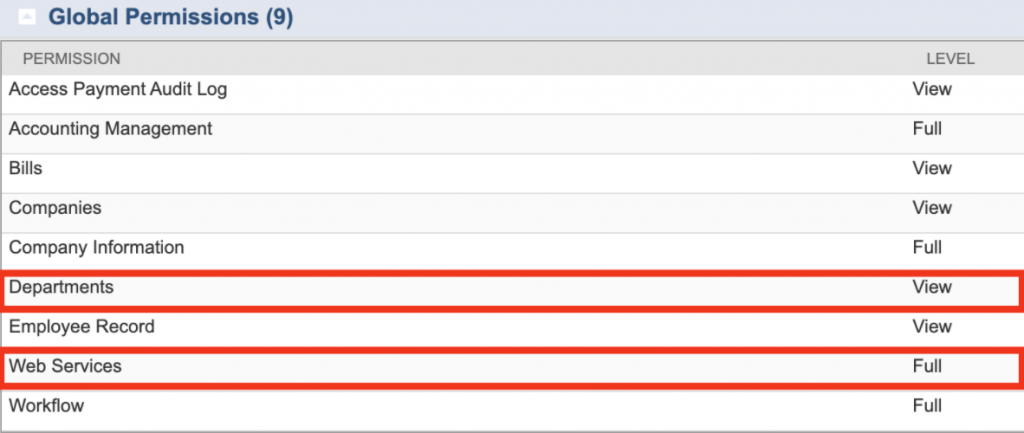
You will also need to ensure that all users wishing to login with TBA have the following permissions: Global Permissions > Web Services = Full and Global Permissions > Departments = View (or higher access level).
- Creating the Integration Record – the application for Token Based Authentication – this is how you will retrieve the Consumer Key and Consumer Secret. Before connecting with a token, an integration record is required for authentication. A new integration record should be used and can be created by navigating to Setup > Integrations > Manage Integrations > New.
- The name field should be filled in along with ensuring that the ‘TOKEN-BASED AUTHENTICATION (TBA)’ checkbox is checked. You can uncheck ‘USER CREDENTIALS’ if you want users to authenticate only using tokens. You may name the integration whatever you wish, such as “Deputy Integration” or “Deputy App”.
Upon saving you will be given a Consumer Key / Consumer Secret.
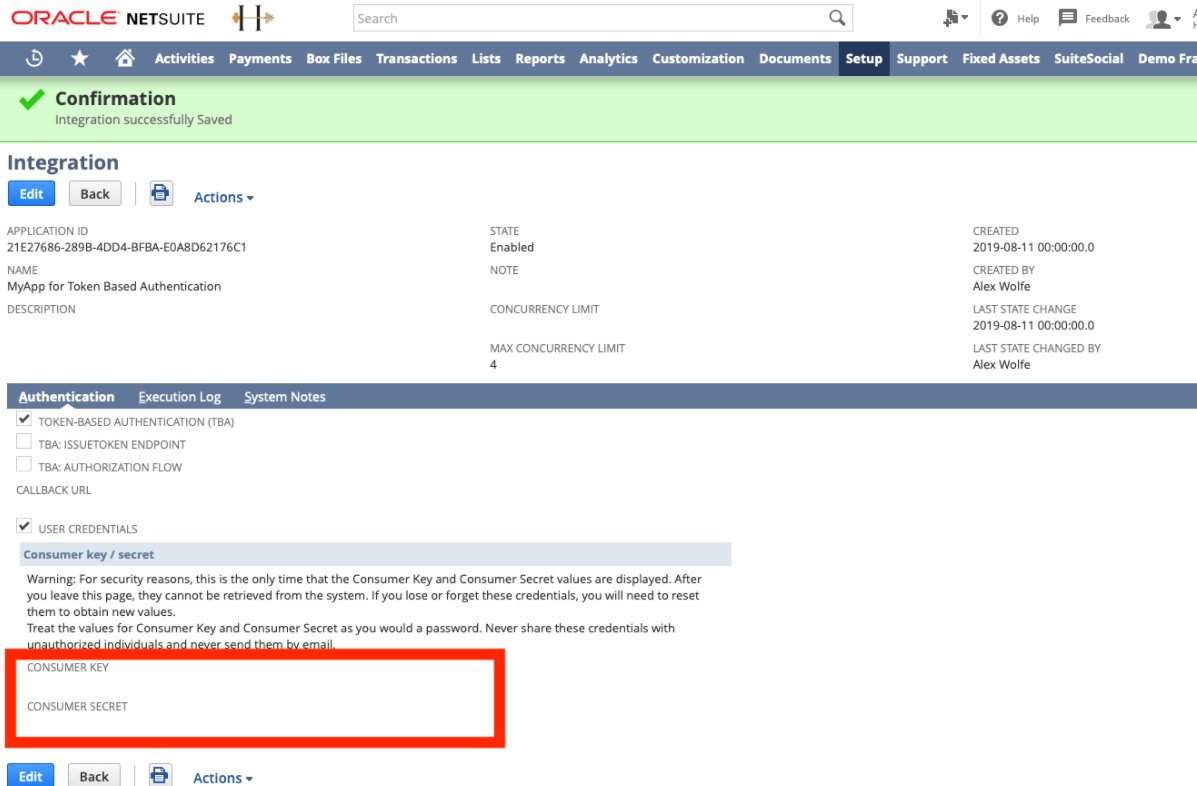
Save These Credentials, If you lose them, you have to repeat the same step again.
- Create the token, With the integration record created and proper role assigned, a token can be created for a user for authentication. To create a token, have the user with the token authentication role login. Click the ‘Manage Access Tokens’ link available on the home dashboard under settings. Create a new token and select the Application Name that corresponds to the associated integration record created earlier. Again, a Token ID and Token secret will be provided. If you lose these values you’d have to repeat the same step again.
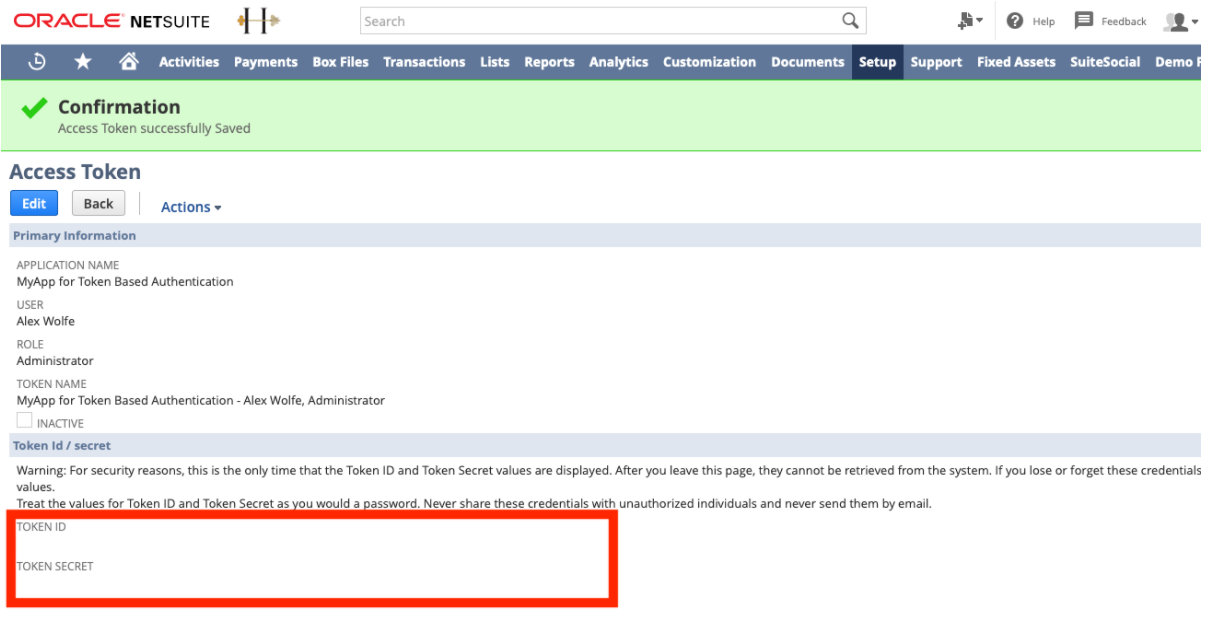
- Account ID is found on the NetSuite URL. Anything between “https://” and “.app.netsui…” is the Account ID. For the Account, TSTDRV1611468 is the Account ID.
![]()
Once you have these, specify the WSDL version, preferably V2020_2, and the port will be generated automatically, if it is not generated automatically, you can manually type it down as services/NetSuitePort_2020_2. Once all of this is set go to Advanced and check whether the Base NetSuite Address is generated or not.
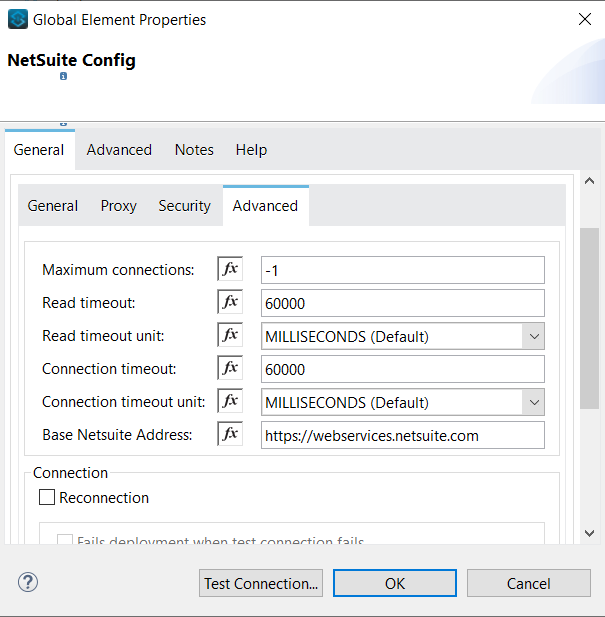
Now the connector is set and the connection will be successful, test the connection once and we are ready to perform some basic operations.
Get Operation:
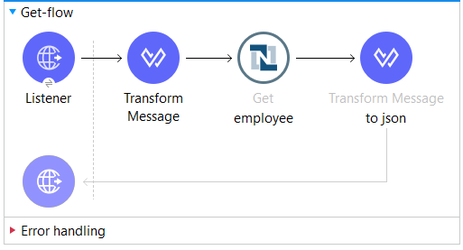
It retrieves a record from a list based on the internalId provided.
First, we set up a Listener with a path and configure an HTTP connection. and then add a NetSuite Get into the flow. There will be two drop-down lists, in Ref types, we have to select the nature of the record, whether it is a custom record or a record given by NetSuite, in the second one we have to select the list from which we retrieve the record.
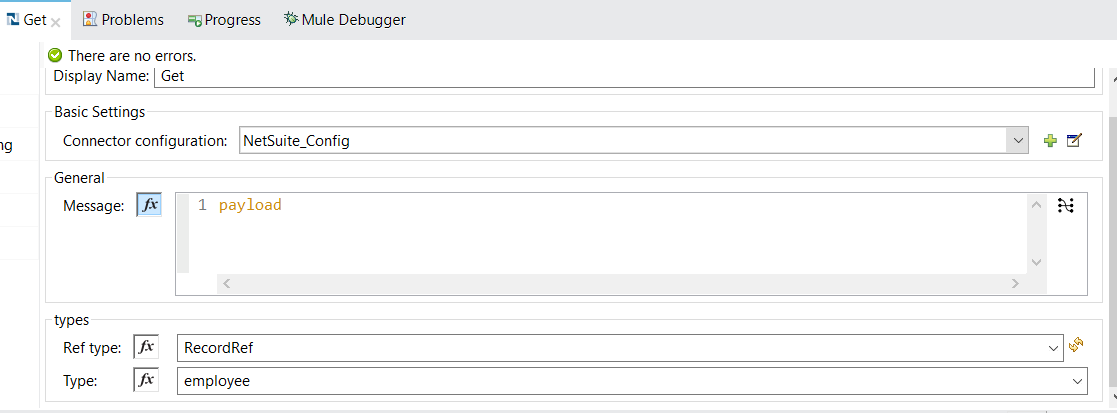
Then add a Transform message before the Get operation and metadata will be generated automatically.

Select InternalId and specify the internalId of the record you want to retrieve, Here most of the work is done, But there is one more additional line of code required, we have to specify the schema, only then the operation will work.

In 5th line we specified the schema and referenced it in line number 9 as xsi#”type”: “ns01:RecordRef”
Now add one more Transform message at the end of the flow and transform the output to json. This Will be enough to retrieve a specified record.

Add Operation :
To add a record into a list we use this operation, we can fill in some fields and those fields will be added into the list as a single record.
First, we add a listener, specify a path, and set the HTTP connector configuration. Then add a NetSuite Add operation into the flow and set the type to Employee.
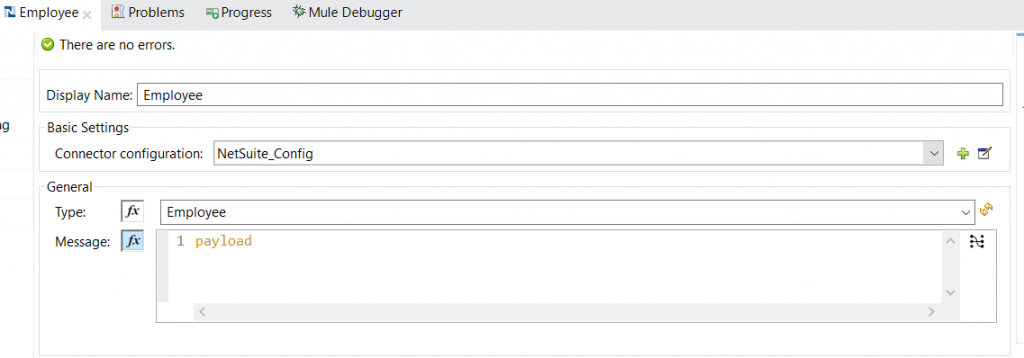
Then add a Transform message before the Add operation, This will automatically generate some metadata, select the required fields from the metadata and fill in the values that you want to add, now we have to specify the schema here, once you specify the schema and reference it, It will be something like this.
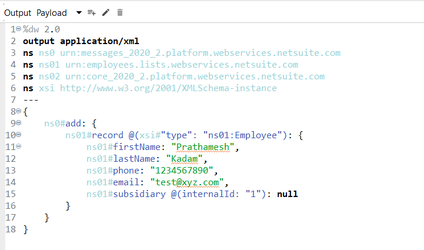
as you can see the schema is referenced in the 10th line ( If you are generating the Transform message through the metadata, please check the namespace value for record in the 10th line, it is automatically generated as ns0#record , it should be ns01#record )
And at the end of the flow add a Transform message and convert the output to JSON. This will generate the following output.
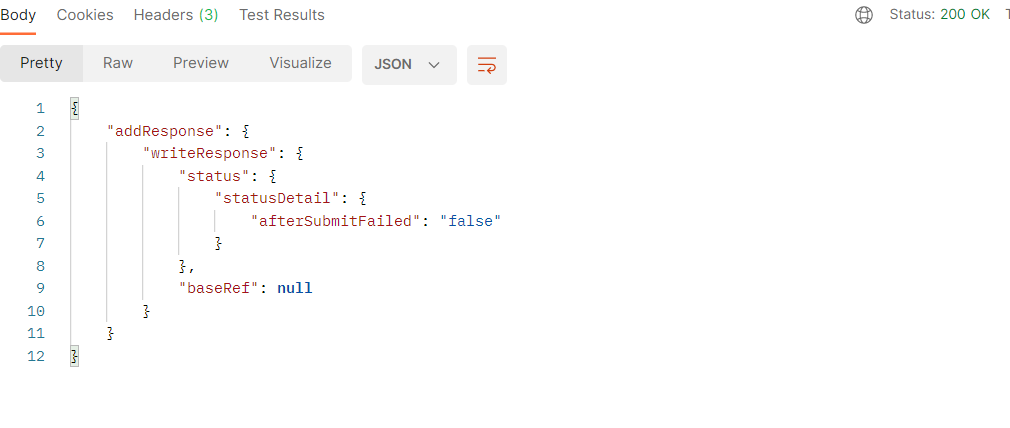
and when you open the NetSuite employees list, the record which is added is visible.

There are a few more basic operations, they are all similar to the above two methods, the only difference being the transform message, Below are the Transform messages of different methods.
Search Operation :

Update Operation :

Delete Operation :

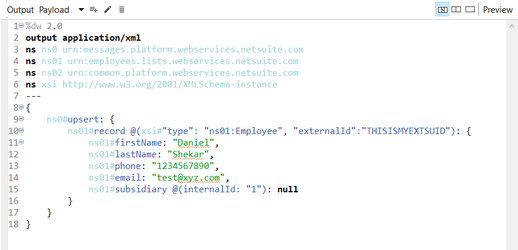
Upsert Operation :
